Every road we drive on is the result of careful planning, engineering, and construction. Whether it’s a highway, city street, or rural access road, every durable road is built layer by layer to safely support thousands of vehicles every day.
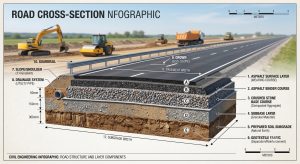
Many people only see the finished asphalt surface, but beneath it lies a carefully engineered structure designed to distribute traffic loads, prevent settlement, and withstand years of use under varying weather conditions.
In this guide, we’ll take you through the complete road construction process—from natural ground to the final asphalt surface—and explain why every layer plays a vital role in creating a safe and long-lasting road.
1. Surveying and Road Design
Every road project begins long before construction equipment arrives on site. Engineers and surveyors first study the proposed route to understand the terrain, existing infrastructure, drainage patterns, and environmental conditions.
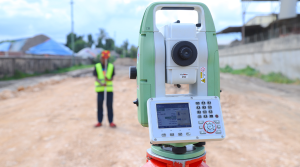
Using Total Stations, GPS equipment, drones, and surveying instruments, they establish the road alignment, centerline, elevations, and boundaries.
The design team then prepares detailed engineering drawings showing:
- Horizontal and vertical alignment
- Road width
- Pavement thickness
- Drainage structures
- Culverts
- Side drains
- Cross-sections
- Traffic safety features
A well-designed road minimizes future maintenance costs while providing a safe and comfortable driving experience.
2. Site Clearing and Grubbing
Once the design is approved, construction begins by clearing the site.
This stage includes removing:
- Trees
- Bushes
- Grass
- Topsoil
- Rocks
- Existing structures where necessary
Removing unsuitable materials creates a stable working area for earthworks and prevents future settlement caused by decaying vegetation beneath the pavement.
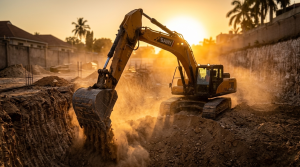
Heavy machinery such as bulldozers, excavators, and loaders are commonly used during this phase.
Engineering Tip
Topsoil contains organic material that cannot support heavy traffic loads, which is why it must be removed before construction begins.
3. Earthworks and Formation Level
Earthworks shape the natural ground into the designed road profile.
Engineers either cut high ground or fill low areas to achieve the required formation level.
Depending on the project, materials may be imported or excavated from borrow pits.
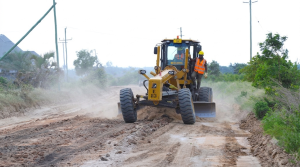
Motor graders then shape the surface to the correct slope and elevation before compaction begins.
Proper earthworks are essential because every pavement layer depends on a stable foundation beneath it.
4. Subgrade Preparation
The subgrade is the natural soil or improved soil that forms the foundation of the road.
It must be properly compacted to achieve the required strength before additional pavement layers are placed.
If the existing soil is weak, engineers may improve it using:
- Selected fill material
- Lime stabilization
- Cement stabilization
- Mechanical stabilization
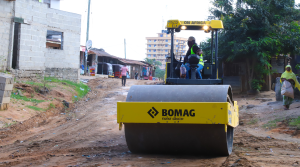
Compaction is performed using vibratory rollers while moisture content is carefully controlled using water bowsers.
Field density tests are carried out to ensure the required level of compaction has been achieved.
Did You Know?
Even the strongest asphalt pavement can fail prematurely if the subgrade is poorly prepared.
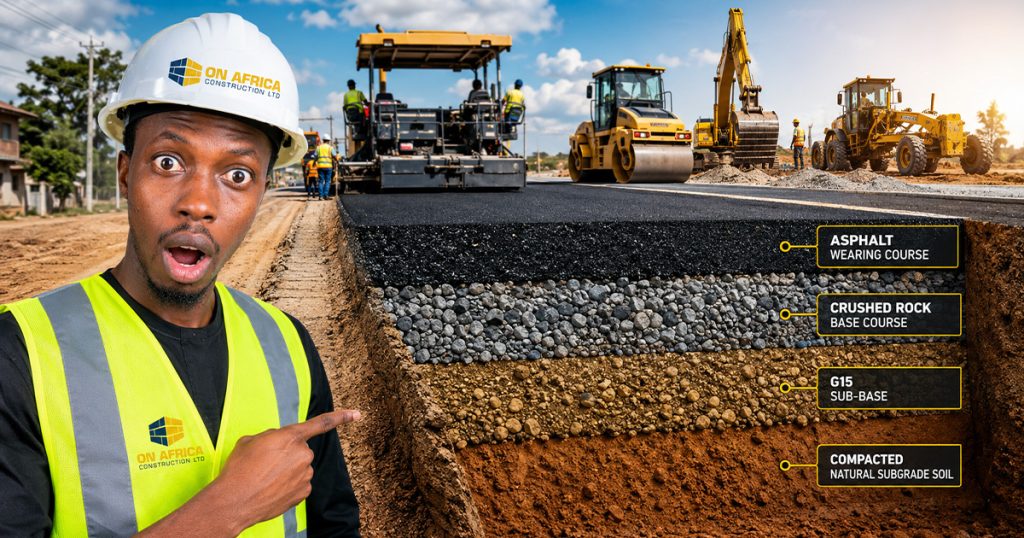
5. G15 Improved Subgrade Layer
On many road projects, a G15 selected material layer is placed above the natural soil.
This layer improves the bearing capacity of the road and provides a more uniform working platform for subsequent pavement layers.
After spreading the material, graders shape it to the required thickness before compaction is carried out using heavy rollers.
Laboratory testing ensures the material meets the required engineering specifications.
6. G7 Subbase Construction
The G7 layer provides additional structural support between the improved subgrade and the road base.
Its main functions include:
- Distributing traffic loads
- Improving pavement stability
- Protecting the subgrade
- Enhancing drainage
Each layer is spread evenly, watered where necessary, and compacted until the required density is achieved.
Quality control tests are performed throughout construction to verify thickness, moisture content, and compaction.
7. C1 Cement Stabilization
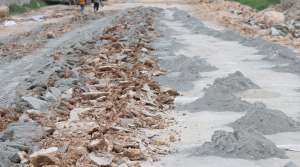
After the G7 layer has been prepared and compacted, a C1 cement-stabilized layer may be constructed to increase the strength and durability of the pavement structure. This process involves spreading a specified quantity of cement over the prepared material and thoroughly mixing it using a reclaimer or stabilizer machine.
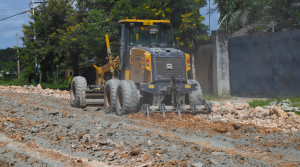
Once the cement and material are uniformly mixed, water is added to achieve the required moisture content. The layer is then shaped with a motor grader before being compacted using vibratory rollers until the specified density is achieved.
Finally, the stabilized layer is cured for the required period to allow the cement to gain strength before the next pavement layer is constructed.
Why is C1 Stabilization Important?
- Increases pavement strength and load-bearing capacity.
- Reduces future settlement and deformation.
- Improves resistance to moisture damage.
- Extends the overall lifespan of the road.
- Provides a stable platform for the Crushed Rock Road Base (CRR).
8. Crushed Rock Road Base (CRR)
The Crushed Rock Road Base (CRR) forms the main structural layer that supports traffic loads.
This high-quality crushed aggregate provides excellent strength and load distribution.
After placement, graders create the correct road profile before rollers compact the material to specification.
Engineers continuously monitor:
- Layer thickness
- Surface level
- Compaction
- Material quality
A properly constructed CRR layer greatly increases the lifespan of the road.
9. Prime Coat Application
Before asphalt paving begins, a prime coat is sprayed onto the prepared road base.
The prime coat penetrates the granular surface, binds loose particles, reduces dust, and improves the bond between the base and the asphalt layers.
The surface is allowed to cure before the next stage begins.
Engineering Tip
Skipping the prime coat can reduce pavement performance by weakening the bond between layers.
10. Tack Coat Application
A tack coat is applied between asphalt layers to ensure they bond together as one continuous pavement.
Without proper bonding, asphalt layers may separate over time, leading to cracking and premature pavement failure.
Specialized bitumen distributors apply the tack coat evenly across the entire road surface.
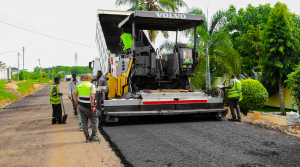
11. Asphalt Paving
This is the stage most people recognize.
Hot Mix Asphalt is transported from the asphalt plant to the construction site using insulated tipper trucks.
An asphalt paver spreads the material evenly across the road at the required thickness.
Immediately after paving, rollers compact the asphalt while it is still hot.
Compaction usually involves:
- Breakdown rolling
- Intermediate rolling
- Finish rolling
Proper temperature control during paving is critical for achieving a smooth and durable surface.
12. Road Markings and Safety Features
Once the asphalt has cooled, the final safety features are installed.
These include:
- Road markings
- Edge lines
- Center lines
- Reflective road studs
- Traffic signs
- Guardrails
- Speed humps where required
These features improve visibility and enhance road safety for all users.
13. Quality Control and Final Inspection
Throughout construction, engineers perform continuous quality control to ensure every layer meets the required standards.
Typical tests include:
- Field Density Test
- CBR Test
- Atterberg Limits
- Gradation Analysis
- Moisture Content Test
- Asphalt Density Test
- Asphalt Core Sampling
- Surface Level Survey
Only after all tests meet the project specifications is the road approved for public use.
Key Takeaways
- Every road is built layer by layer, starting from natural soil.
- Proper surveying and design are essential for long-term performance.
- Subgrade preparation determines the strength of the entire pavement.
- G15, G7, and CRR layers distribute vehicle loads and improve durability.
- Prime coat and tack coat create strong bonds between pavement layers.
- Asphalt paving must be carried out at the correct temperature and properly compacted.
- Quality control testing is performed throughout construction to ensure safety and durability.
Conclusion
A modern road is much more than a layer of asphalt. Beneath the surface lies a carefully engineered pavement structure designed to carry heavy traffic, resist weather conditions, and provide safe transportation for many years.
Every stage from surveying and earthworks to compaction and asphalt paving plays a vital role in the road’s overall performance. When each layer is constructed according to engineering standards, the result is a road that delivers safety, durability, and value for the community.
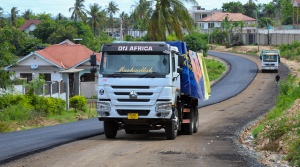
At On Africa Construction Ltd, we specialize in delivering high-quality road and infrastructure projects using modern equipment, skilled professionals, and proven construction practices. From earthworks to asphalt paving, our commitment is to build roads that connect communities and stand the test of time.